It looks like you're using an Ad Blocker.
Please white-list or disable AboveTopSecret.com in your ad-blocking tool.
Thank you.
Some features of ATS will be disabled while you continue to use an ad-blocker.

How to Make a Tin Foil Flower, Happy Valentines Day!
page: 1share:
Happy Valentines Day to all. I decided this year I would give up my little secret on how to make a nice little tin foil flower. I began making these
with the foil from the inside of a cigarette pack as they are the perfect size but for this I will do it in tin foil. They actually look better
smaller but if you don't have the fingers to do small work I suggest you do it a little bigger. The one I am making below is about 3 inches(7.62cm)
which is a little bigger than the one that comes out in a cigarette foil.
On a side note I would truly like to apologize for the pictures. My camera truly sux bad but you will get the jist of it with my description. Sorry again.
 I am working with a piece of foil about 6in(15.24cm) square. In my opinion they
come out better with a rectangular piece when making a smaller one but you can play around with it and see what you like. They only take about 5 min.
to make once you know how so you can make bouquets if you want.
I am working with a piece of foil about 6in(15.24cm) square. In my opinion they
come out better with a rectangular piece when making a smaller one but you can play around with it and see what you like. They only take about 5 min.
to make once you know how so you can make bouquets if you want.
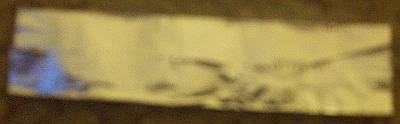
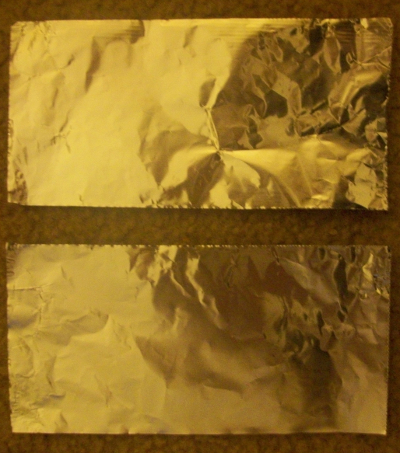 Take your foil and fold it in half to create a crease. Tear the foil along that
crease so you have two halves and place one half off to the side.
Take your foil and fold it in half to create a crease. Tear the foil along that
crease so you have two halves and place one half off to the side.
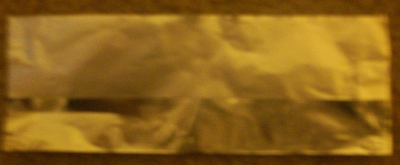 Fold the half you are working on to center, shinny side down.
 Fold the other side to the center so your edges touch.
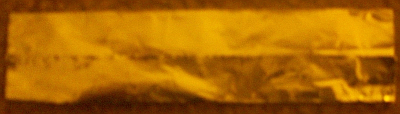
 Fold the whole thing in half length wise. Repeat this step 3 more times. This will
become difficult as it become thinner. If you have finger nails or a card it can help.
Fold the whole thing in half length wise. Repeat this step 3 more times. This will
become difficult as it become thinner. If you have finger nails or a card it can help.
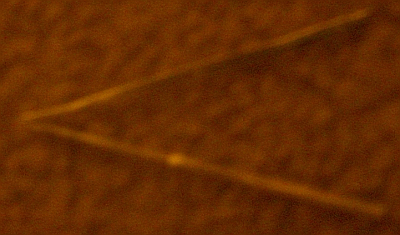 Fold it in half one more time but this time width wise. you should now have a
piece that looks like a pair of tweezers. Set it aside and collect the other piece.
Fold it in half one more time but this time width wise. you should now have a
piece that looks like a pair of tweezers. Set it aside and collect the other piece.
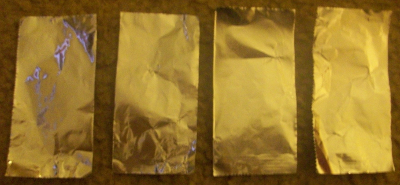 Fold the new piece in half length wise and tear along along the crease. then
repeat for the 2 new squares so you now have 4 rectangles.
Fold the new piece in half length wise and tear along along the crease. then
repeat for the 2 new squares so you now have 4 rectangles.
 Fold it to center on both sides just like you did to start the long skinny piece,
but do not fold it in half quite yet.
Fold it to center on both sides just like you did to start the long skinny piece,
but do not fold it in half quite yet.
 Fold the corners in like you would in making a paper airplane.
 Fold it in half to form a trapezoid. Then repeat for the other 3 pieces.
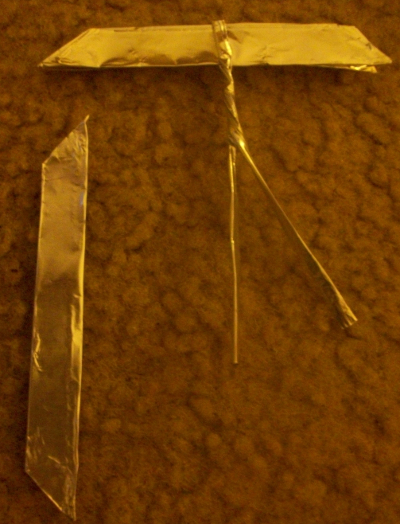 Take 3 of the trapezoids and place them side by side in the same direction. Slide
them up into the V you made before. Make sure they are all the way up and twist the V to hold them snugly in place to about half way down.
Take 3 of the trapezoids and place them side by side in the same direction. Slide
them up into the V you made before. Make sure they are all the way up and twist the V to hold them snugly in place to about half way down.
 Place the last piece into the V and twist it the rest of the way down making sure
the pieces are held nice and snug.
Place the last piece into the V and twist it the rest of the way down making sure
the pieces are held nice and snug.
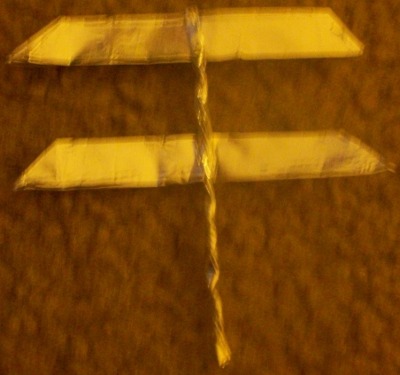
To Finnish simply open all the pieces and flatten them as you wish. In this example I also bent the tips up on the flower but not the leaves and I tilted the flower a little down but you can play with it and put it how you like the way it looks.
[atsimg]http://files.abovetopsecret.com/files/img/aw511c8d12.JPG[/atsimg]
If you think the petals look odd due to being a touch too long you can simply take it back apart and tear them to length. You can also make more petals and over lap them in layers to make carnations(not pictured)
I hope you enjoy making these. I make a bunch every year and just hand them out to people on the street just to bring a smile to someones face. Have fun, safe and Happy Valentines Day.
Edit to add: Feel free to post your creations and if you have a better camera and would like to post clearer pictures of the process feel free. I may make a rose and post it in the thread.(not with instructions as they are very much more complicated)
On a side note I would truly like to apologize for the pictures. My camera truly sux bad but you will get the jist of it with my description. Sorry again.
I am working with a piece of foil about 6in(15.24cm) square. In my opinion they
come out better with a rectangular piece when making a smaller one but you can play around with it and see what you like. They only take about 5 min.
to make once you know how so you can make bouquets if you want. Take your foil and fold it in half to create a crease. Tear the foil along that
crease so you have two halves and place one half off to the side. Fold the half you are working on to center, shinny side down. Fold the other side to the center so your edges touch. Fold the whole thing in half length wise. Repeat this step 3 more times. This will
become difficult as it become thinner. If you have finger nails or a card it can help. Fold it in half one more time but this time width wise. you should now have a
piece that looks like a pair of tweezers. Set it aside and collect the other piece. Fold the new piece in half length wise and tear along along the crease. then
repeat for the 2 new squares so you now have 4 rectangles. Fold it to center on both sides just like you did to start the long skinny piece,
but do not fold it in half quite yet. Fold the corners in like you would in making a paper airplane. Fold it in half to form a trapezoid. Then repeat for the other 3 pieces. Take 3 of the trapezoids and place them side by side in the same direction. Slide
them up into the V you made before. Make sure they are all the way up and twist the V to hold them snugly in place to about half way down. Place the last piece into the V and twist it the rest of the way down making sure
the pieces are held nice and snug. To Finnish simply open all the pieces and flatten them as you wish. In this example I also bent the tips up on the flower but not the leaves and I tilted the flower a little down but you can play with it and put it how you like the way it looks.
[atsimg]http://files.abovetopsecret.com/files/img/aw511c8d12.JPG[/atsimg]
If you think the petals look odd due to being a touch too long you can simply take it back apart and tear them to length. You can also make more petals and over lap them in layers to make carnations(not pictured)
I hope you enjoy making these. I make a bunch every year and just hand them out to people on the street just to bring a smile to someones face. Have fun, safe and Happy Valentines Day.
Edit to add: Feel free to post your creations and if you have a better camera and would like to post clearer pictures of the process feel free. I may make a rose and post it in the thread.(not with instructions as they are very much more complicated)
edit on 14-2-2013 by Agarta because: (no
reason given)
Very cool. I bet my daughter would enjoy making these. Thank you for sharing.
reply to post by Agarta
Somebody in my speech class made paper flowers for their demonstration speech the other week. If I knew there was a way to make tinfoil flowers at the time, I would of destroyed those paper flowers.
Somebody in my speech class made paper flowers for their demonstration speech the other week. If I knew there was a way to make tinfoil flowers at the time, I would of destroyed those paper flowers.
Thanks for including the pics! I will give it a try tomorrow. Happy Valentine's day to you!
Here are a couple of the rose I was talking about. If you look close you can even see its thorn. All Tinfoil LOL.
[atsimg]http://files.abovetopsecret.com/files/img/io511cb506.JPG[/atsimg]
[atsimg]http://files.abovetopsecret.com/files/img/lk511cb4f6.JPG[/atsimg]
[atsimg]http://files.abovetopsecret.com/files/img/io511cb506.JPG[/atsimg]
[atsimg]http://files.abovetopsecret.com/files/img/lk511cb4f6.JPG[/atsimg]
reply to post by Agarta
Thanks, You just saved me £50
Do you know how to make tin foil chocolates too by any chance?
Thanks, You just saved me £50
Do you know how to make tin foil chocolates too by any chance?
Originally posted by davespanners
reply to post by Agarta
Thanks, You just saved me £50
Do you know how to make tin foil chocolates too by any chance?
Sorry Dave, there is no substitute for real chocolate. You better get crackin" and haul butt to the candy store ASAP!
reply to post by Agarta
I made a smaller one by accident and it was pretty hard to work with.. Course I have the motor skills of a 5 year old..
Word to the wise.. When twisting the stem to keep the flower petals at the top be careful.. I now have a "Trimmed flower" With no stem, and no leaves hahaha... Meaning don't twist overly hard or it rips off.
I think I am goign to try a double flower petal version with a longer stem and 4 leaves at separate levels.
Got 3 more hours to figure it out..
Also be careful to make sure your petals are exactly centered haha, otherwise, you'll get a "Cute" flower out of it with uneven petal lengths.
Oh and definitely get the part that was being folded over and over (the stem) as skinny as you can. Then the flower petals can come more from the middle instead of a little to the side.
See?
edit on 2/14/2013 by Dustytoad because: (no reason given)
reply to post by Dustytoad
Here is attempt number 2. I'm happy with this one, bu next time I will use a longer piece for the stem.
I cut off one of the leaves on the bottom.. So I cut 1/3 of the "trapazoid" off, and then wrapped the nub around to hold it on to the stem because cutting it made it a little lose.. All good now.

Thank You Agartha. I'm sure the girl girl will be pleased.
Here is attempt number 2. I'm happy with this one, bu next time I will use a longer piece for the stem.
I cut off one of the leaves on the bottom.. So I cut 1/3 of the "trapazoid" off, and then wrapped the nub around to hold it on to the stem because cutting it made it a little lose.. All good now.
Thank You Agartha. I'm sure the girl girl will be pleased.
edit on 2/14/2013 by Dustytoad because: (no reason given)
reply to post by Dustytoad
Those are awesome very nice job
On a side note, they do make colored foil and sell it at hobby stores so you can make the stem and leaves green and the petals red, gold, blue, or silver.
Those are awesome very nice job
On a side note, they do make colored foil and sell it at hobby stores so you can make the stem and leaves green and the petals red, gold, blue, or silver.
One of those in your lapel would go well with a tin foil hat. Everyone likes a dapper conspiracy theorist.
Originally posted by AwakeinNM
One of those in your lapel would go well with a tin foil hat. Everyone likes a dapper conspiracy theorist.
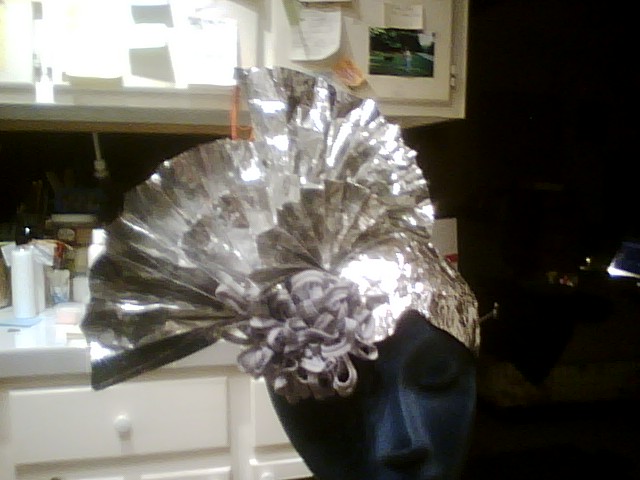
Here's my tin foil hat...kinda looks like a flower...would go perfect with Agarta's tin foil flowers.....
Des
Originally posted by Destinyone
Originally posted by AwakeinNM
One of those in your lapel would go well with a tin foil hat. Everyone likes a dapper conspiracy theorist.
Here's my tin foil hat...kinda looks like a flower...would go perfect with Agarta's tin foil flowers.....
Des
Wow Pretty!
Are you going to post directions to make this?
I'd love to have a pretty tin foil hat. Maybe I could combine the two and make a new tinfoil hat with flowers - ohhh the Queen will be so jealous! plus when the aliens or an EMP come I have some fashionable protection.
reply to post by WaterBottle
Making the rose I pictured above took 45 min so even in a video it would be long. The simple flower took 19 steps although I did cut down on the pics for space the rose is 47 steps and there is very little I can cut out in pics. The stem is the same and the leaves directly under the rose are the same but the long leaves are very different and have extra tearing. It is a much more difficult process. just as the carnation is a harder processes. Maybe one day I will do a part 2 -5 to this thread and show a few other flower types but if you play with the basic one you can make a rose bud by closing the petals, a basic carnation by adding petals, a tulip by bringing the petals up and bending the tips out, etc.
Making the rose I pictured above took 45 min so even in a video it would be long. The simple flower took 19 steps although I did cut down on the pics for space the rose is 47 steps and there is very little I can cut out in pics. The stem is the same and the leaves directly under the rose are the same but the long leaves are very different and have extra tearing. It is a much more difficult process. just as the carnation is a harder processes. Maybe one day I will do a part 2 -5 to this thread and show a few other flower types but if you play with the basic one you can make a rose bud by closing the petals, a basic carnation by adding petals, a tulip by bringing the petals up and bending the tips out, etc.
Originally posted by WaterBottle
What about a rose?
Tin Foil rose tutorial, here:
igottacreate.blogspot.com...
reply to post by spudppc
I'm not sure why you would say that or to whom you are referring but I do have a funny little story that involves the basic flower. Way back when I was 22(43 now) I was visiting some friends in Washington DC. We decided to hit the bar that night and it was 4 or 5 of us in the group. This bar was popular with the college students so it was packed as you can imagine. I saw this girl(very pretty) come in with her friends and she was instantly surrounded by guys bidding for her attention. After she had obtained her drink and sat down, basically ignoring all the attention, I went over and sat down across from her(long group type tables). I pulled out the foil from my cigarette pack and began cleaning up the edges to begin making one of these flowers. Someone asked what I was doing which caught her attention. I did not answer. When I tore the first piece I handed it to her saying "hold this don't lose this". That is all I said the whole time making the flower. I gave her piece after piece and took what I needed back but all I did was repeat that line each time I had a piece for her to hold until the flower was complete and I handed it to her saying once more, "Hold this, don't lose this" and I stood up and walked away without another word. this surprised everyone and all kinds of things and sounds were made because I just walked away. About 20 min. later she found me and we spent the rest of the evening sitting alone talking. Needless to say, I did not go home alone that night. So before you discount it give it a try, it might just be the new pick up line in your repertoire.
I'm not sure why you would say that or to whom you are referring but I do have a funny little story that involves the basic flower. Way back when I was 22(43 now) I was visiting some friends in Washington DC. We decided to hit the bar that night and it was 4 or 5 of us in the group. This bar was popular with the college students so it was packed as you can imagine. I saw this girl(very pretty) come in with her friends and she was instantly surrounded by guys bidding for her attention. After she had obtained her drink and sat down, basically ignoring all the attention, I went over and sat down across from her(long group type tables). I pulled out the foil from my cigarette pack and began cleaning up the edges to begin making one of these flowers. Someone asked what I was doing which caught her attention. I did not answer. When I tore the first piece I handed it to her saying "hold this don't lose this". That is all I said the whole time making the flower. I gave her piece after piece and took what I needed back but all I did was repeat that line each time I had a piece for her to hold until the flower was complete and I handed it to her saying once more, "Hold this, don't lose this" and I stood up and walked away without another word. this surprised everyone and all kinds of things and sounds were made because I just walked away. About 20 min. later she found me and we spent the rest of the evening sitting alone talking. Needless to say, I did not go home alone that night. So before you discount it give it a try, it might just be the new pick up line in your repertoire.
Originally posted by spudppc
You don't get laid much do you?
Was your purpose in joining ATS to find out the member's sex habits....
You should try to make a tin foil flower...not as easy as you may think....
Des
new topics
-
4/27/24 New Jersey Earthquake
Fragile Earth: 4 hours ago -
Fun with extreme paints
Interesting Websites: 5 hours ago -
CIA is alleged to be operat social media troll frms in Kyiv
ATS Skunk Works: 6 hours ago -
Rainbow : Stargazer
Music: 7 hours ago -
I sleep no more.
Philosophy and Metaphysics: 10 hours ago -
Canada caught red-handed manipulating live weather data and make it warmer
Fragile Earth: 10 hours ago -
Why Files Our Alien Overlords | How We Secretly Serve The Tall Whites
Aliens and UFOs: 11 hours ago
top topics
-
Canada caught red-handed manipulating live weather data and make it warmer
Fragile Earth: 10 hours ago, 16 flags -
Why Files Our Alien Overlords | How We Secretly Serve The Tall Whites
Aliens and UFOs: 11 hours ago, 11 flags -
Curse of King Tuts Tomb Solved
Ancient & Lost Civilizations: 12 hours ago, 9 flags -
CIA is alleged to be operat social media troll frms in Kyiv
ATS Skunk Works: 6 hours ago, 6 flags -
4/27/24 New Jersey Earthquake
Fragile Earth: 4 hours ago, 6 flags -
What allies does Trump have in the world?
ATS Skunk Works: 12 hours ago, 5 flags -
I sleep no more.
Philosophy and Metaphysics: 10 hours ago, 4 flags -
Fun with extreme paints
Interesting Websites: 5 hours ago, 2 flags -
Rainbow : Stargazer
Music: 7 hours ago, 1 flags
active topics
-
Ireland VS Globalists
Social Issues and Civil Unrest • 14 • : covent -
Gov Kristi Noem Shot and Killed "Less Than Worthless Dog" and a 'Smelly Goat
2024 Elections • 92 • : cherokeetroy -
Today I am 8
Members • 21 • : randomuser2034 -
Big Storms
Fragile Earth • 19 • : lilzazz -
George Knapp AMA on DI
Area 51 and other Facilities • 40 • : TheDiscoKing -
I sleep no more.
Philosophy and Metaphysics • 13 • : RAY1990 -
Silent Moments --In Memory of Beloved Member TDDA
Short Stories • 76 • : RAY1990 -
Why Files Our Alien Overlords | How We Secretly Serve The Tall Whites
Aliens and UFOs • 11 • : TheValeyard -
What allies does Trump have in the world?
ATS Skunk Works • 6 • : nugget1 -
CIA is alleged to be operat social media troll frms in Kyiv
ATS Skunk Works • 23 • : theatreboy